Welcome to the ETI/Gel Press Blog Hop.
The designers for both companies have been creating wonderful projects. Please
leave a comment on EACH blog. Tell us on the Gel Press blog and on the Resin
Crafts blog as to which projects you found most interesting or inspiring. One
winner will be picked, at random, Sunday, July 31, 2016, at 10pm CST. The winner
will get both Petite sets of Gel Press plates and ETI Jewelry Resin! Hop now
through Sunday! Winner must be 18 or over and live in the USA. Good
Luck!
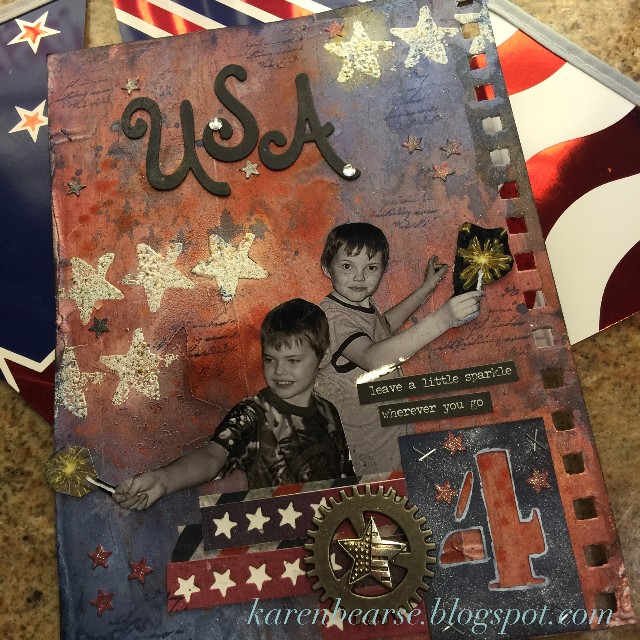
Hello Inky friends, Karen Bearse here. Lets learn how to make a Resin & Gel Press Art Journal. We at ETI are doing a blog hop with Gel Press today. Grab a coffee for this full tutorial (I got quite carried away) or just look at the pretty pictures but join in the fun! Follow along with the hop links at the end of this post.
Hello Inky friends, Karen Bearse here. Lets learn how to make a Resin & Gel Press Art Journal. We at ETI are doing a blog hop with Gel Press today. Grab a coffee for this full tutorial (I got quite carried away) or just look at the pretty pictures but join in the fun! Follow along with the hop links at the end of this post.

For my project I made an art journal. Lets start by practicing & playing with the gel press.I chose Rendr paper by Crescent for the pages in my journal. These papers are wonderful for adding paint & ink as they do not bleed through to the other side. They are heavy than paper but lighter than card stock perfect for a book.

Simply unpack your press taking off the 2 pieces of acetate. Keep the packaging to store you press. Play & get to know your press.
For this project I used Deco Arts acrylic & fluid acrylic paint. You will definitely want to use a brayer to apply paint. Add pea size drops of acrylic paint and move the paint across your press using a brayer. Let the paint move & blend a bit.

The goal
is to get a thin "mayo" layer of paint. Simply place your paper on the press and smooth with your fingers gently. Peel up paper, voila instant
background. Have a piece of spare paper & roll your brayer to clean and start building more backgrounds. Tip: use colors that blend well together to prevent making mud.

Here are just a few color combinations. The background results change depending on how well you blend the colors on the press. To keep the colors bright do not add too many.

Tip: Place rows of colors to create a stripe page of color. Roll the colors carefully keeping the color order on the roller the same, as you move across the press, to avoid contamination. Try different ways to add color & placement on the press. Have fun with it, just play. The paint dries very quickly on the paper and fairly soon you will have a nice stack of backgrounds. Once you get the hang of the gel press move on to design the cover of your art journal book.

For my covers I used Deco Art in hansa yellow medium & quinacridone burnt orange fluid acrylic paint. Instead of regular paper use deli paper, which is what sandwiches are wrapped in. It creates a nice Crinkly result, somewhat transparent where there is no paint. it is a little less waxy than wax paper.You can buy it by the box from amazon or cosco. Make 2 pieces for front and back covers.

Here we go a great place to start! One of my favorite techniques to build the background is using stencils. The Gel Press works with them very well as the stencil plastic sticks to the press, helping to keep the paint from seeping under the stencil, creating a sharper image.

Simply place your stencil on the press, rub a bit to create a seal. If there are letters or words simple flip your stencil on the press so the letters are backwards. Add a few drops of paint, brayer paint across the top of the stencil letting the color go into the empty spaces. Pull the stencil up and you will see the pattern. Take one of your previously made pieces that has the background color down, place on the press and rub.

When you peel the paper up the image will be transferred onto your background. Tip: stencil light colors on dark backgrounds and dark colors on light. The paint is dry so you don't need to worry about creating mud, but this technique helps prevent your pages from looking overworked and dull. Ok lets do that technique on the cover page.

Here I have just added multiple Gel Press pulls using stencils one step at a time. Simply add different stencil images, in different colors using the press until happy with the composition.

Another fun thing to do is take your gel press papers is die cut them into shapes. This technique makes endless embellishments. Add die cut images adhering with decoupage glue. You can doodle on your covers to enhance the images with an acrylic paint pen.
I drew around my gears in white and black to give them some dimension. Once the deli paper is trimmed to the size you want for your covers, it is time to resin.

Wear gloves to make & pour the resin. For this sample Enviro Tex Lite is the best choice but it does work with Easy Cast also. Pour equal amounts of resin & hardener in a cup, stir for 2 minutes. Pour mix into a new cup and with a new stir stick stir 1 more minute.

Check the paper instructions in the kit for tips and full directions. Now it is time to pour the resin. First make sure you have a solid, flat surface where you can leave your resin pieces to dry. *make sure you wear gloves resin is sticky* I like to resin on a craft sheet and move my pieces to a piece of parchment paper. That helps prevent accidental drips from marking the backside of the paper. For a thin layer of resin apply with a piece of cut kitchen sponge and smooth as you go. For a thicker layer use the stir stick to drop resin onto the paper and spread it. Start with the back side & carefully flip your paper over and resin the top side then set aside top side up to dry for 12 hours. You will be left with a plastic like encased paper. See my blog post here on Resin paper for more ideas & information. If you are punching holes for binding, make sure the resin is not too thick to be punched.

Once the resin is completely set you can punch holes using The Cinch binding system. While you are waiting for the covers to set make your pages for the journal. I used Rendr Paper from Crescent. They are thicker than regular paper and have the bonus that the paper does not bleed through. Perfect for Gel Press! Cut your paper to fit your journal covers or a bit smaller if you like. Simply punch holes with The Cinch or your binding system and you are finished!!! I hope you try this tutorial, let me know how it goes! To hop to the next blog click on Keri's link. Enjoy the hop!